


🚀 Unlock your maker potential with the ultimate Raspberry Pi 3 starter kit!
The CanaKit Raspberry Pi 3 Complete Starter Kit offers a powerful quad-core 1.2 GHz Broadcom processor, 1 GB RAM, and a pre-loaded 32 GB Class 10 microSD card with NOOBS. Featuring built-in WiFi and Bluetooth, this all-in-one kit includes a premium case, HDMI cable, heat sinks, and a UL-listed power supply, making it the perfect launchpad for tech enthusiasts and professionals diving into IoT, coding, and DIY electronics.


| ASIN | B01C6Q2GSY |
| Brand | CanaKit |
| Built-In Media | Ankuwa |
| CPU Speed | 1.2 GHz |
| Compatible Devices | [Inferred] Monitors, keyboards, mice, and other peripherals with WiFi, Bluetooth, USB, HDMI, or GPIO connectivity; devices running Linux or Windows 10 IoT Core |
| Connectivity Technology | Bluetooth, GPIO, HDMI, USB, Wi-Fi |
| Customer Reviews | 4.7 out of 5 stars 3,255 Reviews |
| Item Weight | 1 Pounds |
| Manufacturer | CanaKit |
| Memory Storage Capacity | 32 GB |
| Mfr Part Number | 99150 |
| Model Name | RPi3 |
| Model Number | 99150 |
| Operating System | Linux |
| Processor Brand | Broadcom |
| Processor Count | 4 |
| Processor Speed | 1.2 GHz |
| RAM Memory Installed | 32 GB |
| RAM Memory Technology | DDR3L, LPDDR2, LPDDR3 |
| Ram Memory Installed Size | 32 GB |
| Total Usb Ports | 4 |
| UPC | 682710991504 |
| Warranty Description | 1 |
| Wireless Compability | Bluetooth |
L**R
For HD (1080) TV viewing, movie watching and channel changing, THIS is the Raspberry Pi 3 kit to get.
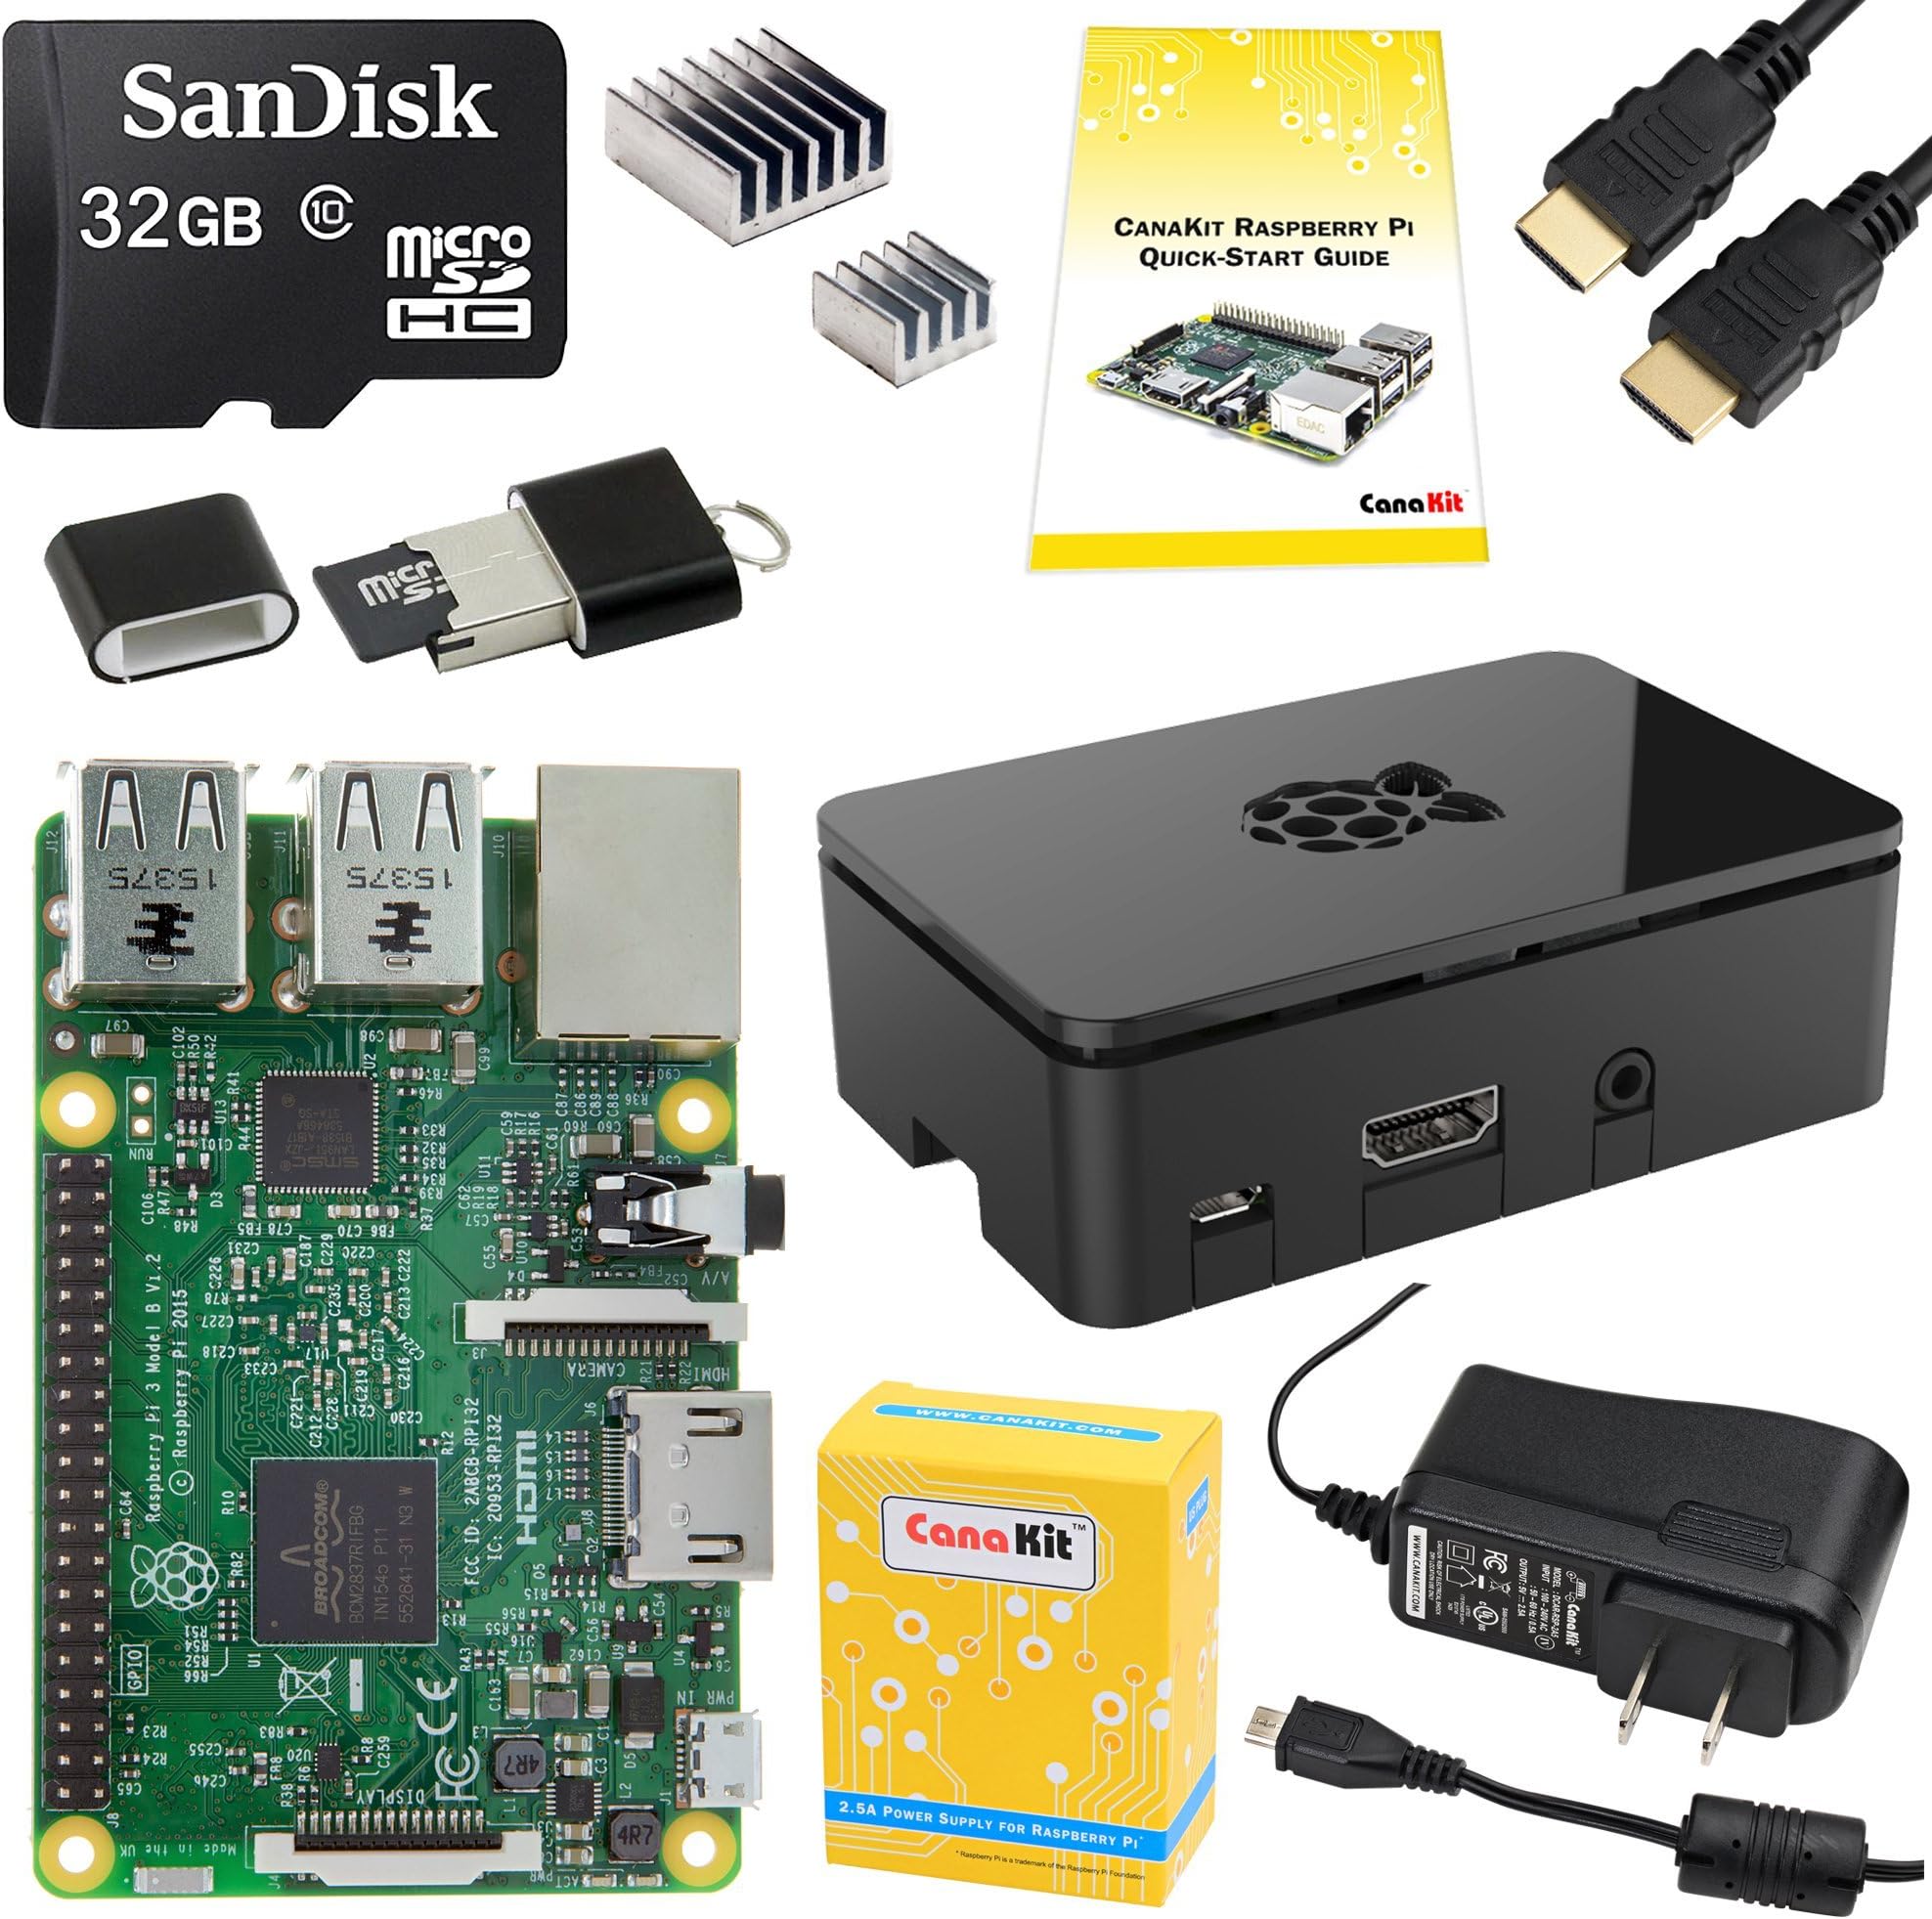
I'm using this Raspberry Pi 3 (RPI3) for HD Video and it is excellent. The maximum resolution is 1080. Don't expect 4K resolution.. Make no mistake 1080 looks great. ZERO lag. Audio and video are great. Here's my setup: I used the software (and excellent instructions provided) to load LibreELEC 7.0.3 (this is the operating system that runs on the RPI3). Following the excellent instructions, the RPI3 booted right up. LibreELEC 7.0.3 is an OS that has one function and that is to run the Kodi (version 16) application. Kodi is an excellent way to watch TV, movies, etc. Kodi supports addons (somewhat like a browser extension in Firefox or Chrome). If any of this sounds complex, don't shy away. Trust me, I was no expert in any of this (I only found out that a Raspberry Pi existed a few weeks ago). YouTube to the rescue. There are so many YouTube videos on the Raspberry Pi, LibreELEC 7.0.3, Kodi and Kodi addons that you are only limited by your patience and your imagination. Take the easy path and follow the instructions and software that the nice folks at CanaKit put together for you. Actually following instructions would have cut considerable time from my setup. I told you I was no expert. Now, here's the backstory as to why I needed to order this RPI3 and run LibreELEC 7.0.3 to get the Kodi application. Just after Thanksgiving (2016), I purchased a Samsung SUHD K-series. Great picture, but I soon realized I couldn't set favorite channels or change channels directly with the Samsung TV. I needed to use the cable box (not a fun experience). I had been using Kodi to watch TV on my computer, but wanted the same experience on my Samsung TV. The RPI3 running LibreELEC 7.0.3 (the operating system) which runs the Kodi application is just perfect, in my opinion. And I almost forgot to mention - the Samsung K-series remote recognizes the Kodi application on the RPI3. I'm still not quite sure how that got setup, but the Samsung remote navigates through the Kodi application perfectly. Another point in favor of this RPI3 kit. One final point on the setup. Those little silver thingys in the box are heat sinks. Peel the adhesive backing off and gently press them in place on the RPI3. You can't make a mistake. The larger heat sink sticks to the larger chip (or square) on the RPI3 and the smaller heat sink sticks to the smaller chip on the RPI3. Trust me, it'll be obvious where to place them. I've had more problems putting on my DMV license tag than putting these two heat sinks in the right places. So I don't scare you off, we'll just call them two little silver thingys you need to peel and stick on the board of the RPI3. I wish I would have started with the RPI3 running OpenELEC and Kodi instead of trying to screen mirror via a few different hardware solutions which don't work as well as the RPI3/Kodi and shall remain nameless. Screen mirroring is a nice idea, but I wanted to use the TV's remote to set/change channels. Screen mirroring is nice if your computer is near your TV and the computer's keyboard/mouse are available to you while you are watching TV. The RPI3/Kodi setup acts like it is a part of the TV since I can change channels in Kodi with the Samsung's remote. I finally have the TV viewing experience I wanted. Thanks CanaKit and RPI3. If you want to use the RPI3/Kodi to watch live TV then the following is important. For completeness, the RPI3 connected to my Samsung TV is talking to the computer in my home office which is running NPVR (open source). NPVR is the backend software that does the recording and provides the channel guide (called Electronic Program Guide). You'll also need a TV tuner. Have no fear, Amazon sells the SiliconDust HD Homerun Prime, which is an awesome product, itself. The SiliconDust HD Homerun Prime connects into my cable modem and connects to my home network. Nothing to worry about. SiliconDust makes setup easy. In my setup, I defined the channel list on the SiliconDust HD Homerun Prime. Over 100 available cable channels and I only let the SiliconDust HD Homerun Prime pass through 27 channels to me for viewing. So nice. Again, don't let any of this information scare you away. I learned all I needed about setting up NPVR from YouTube :(once I actually figured out that NPVR was what I needed). Here's a good test. If you can currently watch TV on your computer, you are well on your way to connecting this RPI3 up to your TV to watch TV and movies. Your TV does need an HDMI connector since that is the video output of the RPI3. The RPI3 is getting the TV/movie signal via the network connection. It has no cable coax connection. If you really want to get inspired, search online under the topics of Kodi and addons. You will be amazed. I really wish someone else had written this review about a month earlier. I probably would have spent more time binge watching and less time struggling with hardware and software during my Christmas week off. I sincerely hope this review helps someone. Have fun!
T**.
Great Beginner Kit and Better Than the NES Classic Edition
I got this as a Father's Day gift(a day early, yesterday) and my family is already loving it. The motivation for me asking for it was the NES Classic Edition that came out last year. My wife really wanted one of those to relive her childhood and we were not able to get one of them, without paying way above MSRP. So after doing some research, I looked into the Raspberry Pi. This kit comes with everything you need to get started on projects. As I wanted to turn it into a game emulator, I also picked up a couple of inexpensive gamepads and cable extenders. I also had an extra 32GB microSD card at home. So I kept the one the kit includes as is, so I can play around on Raspbian, just by swapping cards. Then I put Retropie on the extra card. It installed perfectly and works like it should on the RPi. Games(ROMs) are easy to install as I can just download them on my home computer and drop them into the Retropie folders over the home network. It just took a few hours for me to get everything set up. Now it can play NES, SNES, Sega Genesis, Atari, N64, Game Boy Advanced, etc. games with no problem. My wife and kids spent all day today playing on it. All-in-all, it cost maybe $20 more than the NES Classic Edition with a second controller and cord extenders, and yet it is way more robust and can play multiple platforms and more than 30 games. So thanks to Nintendo for creating artificial hype by under-manufacturing the NES Classic Edition and then discontinuing it. You motivated me to get something better. I'll likely pick up another 1 or 2 of these kits down the road to build a VPN for my home network and also as an inexpensive computer for school work for the kids. The provided OS comes with a browser and Libreoffice, which is a free(open-source) MS Office-type package. All you need for it is an HDMI monitor, and a USB keyboard and mouse. The Raspberry Pi is a very cool little computer and this kit has everything you need to get started as a beginner.
D**H
Great kit, great company!
I am sure you, like me, often receive products where you really wonder if the vendor cared about the customer experience or if they were only there to move a product. I am one that will sacrifice customer hand-holding for price, especially if its a product I'm familiar with and anticipate few problems. What a joy though to find a company that provides both, a reasonable price and a great customer experience. This is not a review of the Raspberry Pi 3, you can find those elsewhere, but I will say the increased speed is very apparent and the embedded wifi/bluetooth is fantastic. What I would like to comment on though is CanaKit. The CanaKit Raspberry Pi 3 Complete Starter Kit is not a bunch of various parts tossed in a box, taped up, and shipped out. The packaging is inviting, the components are laid out in a manner that tells you someone cared about their job. The first thing you notice on opening the box is a "Dear Valued Customer" note with a prominent email address to ask for help. Flip the card over and it has a Raspberry Pi GPIO Header Quick Reference. The card is glossy heavy weight and useful so this is something I will hang on to. A quick start guide is included with just the facts. Need more info the website address for latest version info is included. The box that contains the Pi case has a link printed on it for an installation video and a note telling you how to remove the memory card with the Pi in the case. I guess a few customers may have had problems, great solution to add a sticker FAQ. The box with the Pi includes its own link for startup instructions and a not that the 32GB SD card is inside so be careful throwing away packaging. An ample power supply, heat sinks (this thing does get hot), and a HDMI cable gets you running right away. One last thing - the Pi3 works great.
S**A
Single best solution Ive found for a Kodi machine and So much more
Absolutely fantastic. I'll get right to it- are you looking for the easiest solution for running a Kodi install? This is it. Up and running in minutes. No fumbling with drivers, or Windows or macOS, or anything. You have the option to run Debian on it or LibreELEC- which is light and smooth. Smooth playback, and worked with my old Windows Media Center remote- that was a bonus! Pros: Has everything you need to get running in minutes, including a microSD already loaded with NOOBS Has case, thermal pasted heat sinks, quality HDMI cord, and power adapter Everything loaded via web, or local with zero slowdowns Runs WAY better than my older Acer Revo I had running kodi on WIN 7 No moving parts Has support for Bluetooth and CEC and WIFI Bonus for headphone jack that can also run older video cords Granted most of that is already just the Pi3 anyway but the kit really makes things plug and play CONS: I believe theres always room for improvement so my only cons for the kit is: Need the power block now since pi3 is taking more power (unless im mistaken) The case could be better constructed. Its just a little TOO light, and feel it should snap close (mine wont) and overall feels like the worst part of the kit. Would I buy this again? I actually plan on buying a couple for family and friends in the near future. It feel like this is the revision where everything feels super smooth and works the way its intended. But theres more! Sure its a great Kodi machine but this is a phenomenal little computer that can do all sorts of things. I plan on picking up another just to use as a camera and some fun VJ projects. Grandma or kids need a web computer? This is perfect! Travel machine? This is it! Webserver? this is light and perfect for small duties.
R**Y
the little box that could!!
this thing is a gem! cheap, easy to get started and reliable. I have been looking for something easy to get 80's and 90's nostalgia, and this little box fi the bill perfectly. paired it with retropie and it was up and running within a few minutes. PROS- super fast small form factor no case fan (but you can add one if you want to, not really needed easily recognized peripherals ( keyboard and logitech usb controller) Cons: NO on/off switch. (biggest bone head move ever) but you can buy on one amazon for a few dollars. linux operating system-learning curve for sure. if it hadn't been for the lack of the on/off switch i would have given this five stars. i didn't use the included NOOBS. i just deleted the pre-installed image and installed retropie. now, i can play all my favorite 80's and 90's games. this thing will run everything from atari up to sega cd without issue. just google search "retropie" and you can find all the information you need. its as simple as mounting a iso image to a micro sd card. very easy, and fun to do. over the past year, i have looked and looked at retailers for NES and SNES classic, but Nintendo, in their "wisdom", decided to only release a FEW of these. wasn't going to go on ebay and pay 2, 3, or 4 times what console was worth. so i went this route and i'm glad i did. this kit had everything i needed and i was playing my favorite classics in minutes. get one today, these little machines are great!
S**R
Very nice kit for a good price, easy to set up and use
The kit is reasonably priced and contains raspberry pi 3 b board, heat sinks, case, power supply, hdmi cable, a usb micro sdcard reader and a micro sdcard preloaded with the "noobs" software which allows choosing and downloading/installing the OS. It's a great out of the box set up, just remove the wax paper-like backing on the heat sinks and stick them to the appropriate chips on the board. Pull the case apart and insert the board into the case. Insert the micro sdcard into the slot on the underside end of the case. Connect the HDMI cable between your monitor and the pi and then plug the power adapter in. You'll see the prompts/menus on the screen for connecting to your wifi and choosing the operating system to download install. You might save a little money by buying parts separately and not getting the usb card reader (not really required) or not ordering parts you might already have such as the micro sdcard, HDMI cable or 5v power adapter. However you would then waste your time being sure they all work together (is the card fast enough, does your current power adapter supply 2.5 Amps, etc). Why bother when this is inexpensive and you know it will work? The case fits perfectly and all the parts are nicely thought out and it's a good product. The pi itself is more responsive than I imagined and while it won't replace a desktop or laptop with more power, it's perfectly useable with careful software selection using the raspbian Linux distribution and is fun to play with and would be a great machine for dedicating to one task or for light general usage. It's helpful to have some Linux knowledge if you're going to use raspbian, but you should feel right at home if you have previous Linux experience. I installed chromium for a browser which seems to work much better than Firefox/Ice Weasel which was slow and laggy. Their default browser is ok, but a bit basic for some sites. It's quite an enjoyable purchase for a hobbyist or enthusiast.
M**N
My first raspberry pi
This is a very nice kit, easy to assemble. Quality case and HDMI cable and a decent power supply. I didn't need to use the micro USB card reader but it's a handy thing to have so I'll toss it in my drawer of goodies. The included micro SD card had a Raspbian installer on it. Quick and easy install and everything worked out of the box, including wifi and bluetooth, although I'm still struggling to get a reliable connection with a bluetooth keyboard, but that's nothing a Logitech keyboard with 2.4GHz unifying receiver can't fix. I was a bit skeptical when I heard people were playing HD movies with this guy... 1GB of memory and a 1.2GHz CPU doesn't seem like a whole lot compared to a modern desktop but that's what most of us have in our phones and those can play movies so I figured I'd give it a shot. I had to tweak the system / gpu memory split (gave 128MB to the gpu), but once I did that video playback was great. kodi (xbmc) is easy to install with the package manager. With a few tweaks you can even remote control it with the kore app on your phone. Very cool. A USB hard drive works, but I was also able to NFS mount my main desktop over wireless (N) and stream both large and small movies from there without a problem. I'm extremely happy with the pi and the kit. I'd do it again in a heartbeat. Thanks!
K**S
The 2 heat sinks already had adhesive material on them and were easy to install
This is the first Raspberry Pi kit I have purchased and I decided to get this kit because it had just the right tools to get started on just about any project. The kit arrived as advertised and all material feels to have a solid build quality. Inserting the RasPi into the case was tricky, but after about 10 minutes of not quite figuring it out, I opened the quick start guide and found a link to a video that helped me install it in less than 30 seconds. The 2 heat sinks already had adhesive material on them and were easy to install. I am not quite sure if I will ever need to use the USB MicroSD adaptor, but it is nice to have in case I do ever need it. The HDMI cable does not appear to be gold plated, which is a slight downgrade from other HDMI cables, but it gets the job done. The only thing I found disappointing about was the fact that the quick start guide (as well as the CanaKit website as far as I can tell) does not mention anything about how to manually add a hidden network in Rasbian. It is rather easy, but does require some Linux and programming know-how to accomplish. If CanaKit would created a tutorial and include that in their quick start guide, it would be a huge benefit for those who are not very familiar with Linux or programming. However, this is not enough to bring down the rating any. Overall, CanaKit provide a great value to price ratio with this kit.
J**O
Kit de Raspberry Imprescindible
Este kit de Raspberry 3 es muy completo para comenzar con proyectos basados en esta plataforma. La capacidad de la memoria micro SD (32 GB), la precarga de NOOBS permite iniciar facilmente la instalación de un sistema operativo, ademas de que el Adaptador de Corriente tiene una salida de voltaje con capacidad de 2.5 AMP, esto permite utilizar los puertos USB con dispositivos sin usar un HUB de USB. El cable HDMI incluido asi como el Case y los disipadores de calor, son de muy buena calidad y sobretodo permite un funcionamiento adecuado del dispositivo. PROS - Capacidad de la memoria micro SD de 32 GB incluida en el kit y precargada con NOOBS. - Excelente Calidad de los componentes del Kit - Adaptador de Corriente con la capacidad de carga de 2.5 AMP - Raspberry 3 Model B incluye Wi-Fi y Bluetooth embebidos - Adaptador USB para micro SD (No es un adaptador SD como en otros kits) CONS - No encontre nada malo con este Kit, muy completo y justo lo necesario para comenzar a trabajar.
A**R
Good quality
Genuine product. Good quaity.
C**S
Muy buen kit
Llegó en perfecto estado, funciona fenomenal, el sistema precargado en la tarjeta sd hace que todo sea muy sencillo, la carcasa, cables y demás se ven de buena calidad.
C**N
Lo que necesitaba en la universidad
Buen producto para desarrollos de IoT
N**S
Raspberry Buen producto
Buen producto
Trustpilot
1 week ago
3 weeks ago