Description
🤖 Build, Code, Conquer: Your DIY Robot Revolution Starts Here!
- COMPACT YET MIGHTY - Sleek acrylic chassis fits anywhere while packing advanced programmable features.
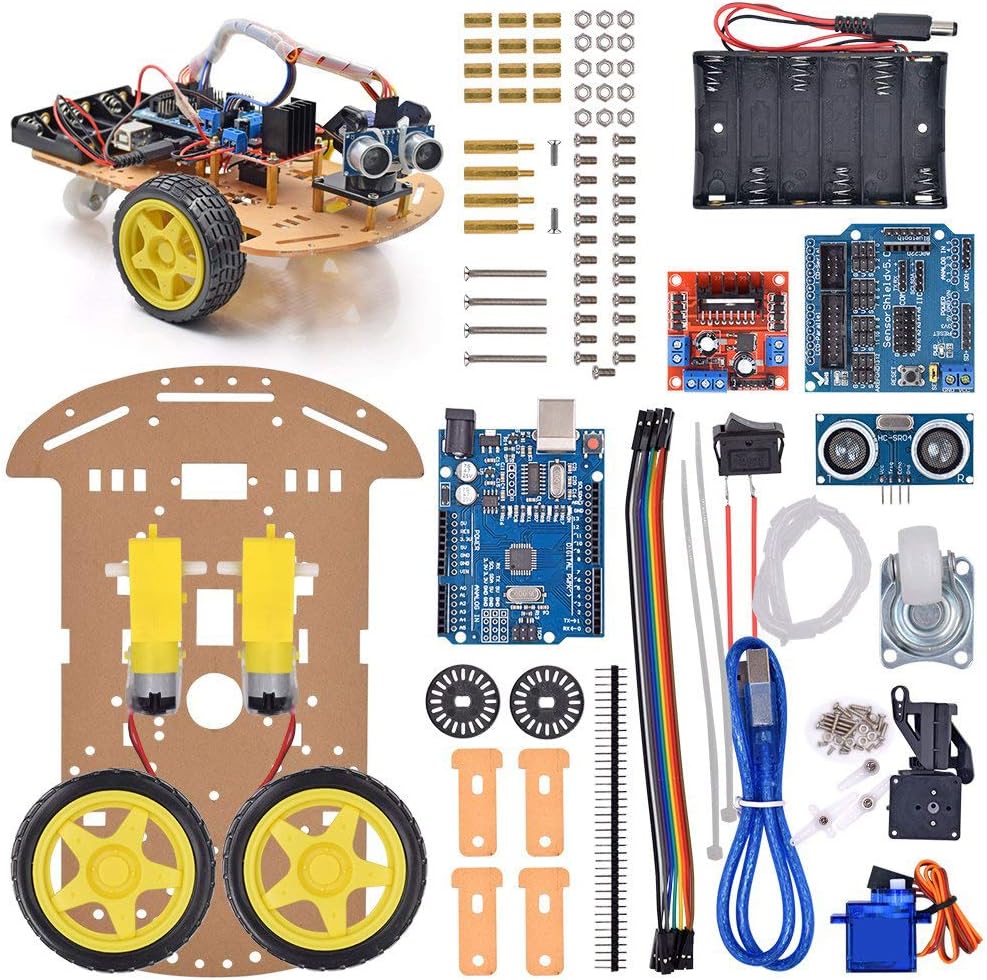
- ALL IN ONE LEARNING KIT - Includes UNO R3, L298N driver, and 4 tracking modules for versatile robotics projects.
- PRECISION SPEED TRACKING - 20 wire speed encoders enable real-time obstacle avoidance and distance measurement.
- SUPPORT THAT HAS YOUR BACK - Comprehensive tutorials plus expert customer service ensure your success.
- PLUG PLAY STEM POWERHOUSE - Quick assembly design gets you coding and creating in no time.
The Smart Robot Car Chassis Kit with UNO R3 Module is a beginner-friendly, programmable 2WD robot platform designed for hands-on STEM education. Featuring a compact acrylic chassis powered by AA batteries, it includes advanced modules like speed encoders, tracking sensors, and an L298N driver to enable obstacle avoidance and speed measurement. Perfect for ages 12+, this kit combines easy assembly with comprehensive tutorials and customer support, making it an ideal gift for aspiring programmers and tech enthusiasts eager to master robotics fundamentals.